


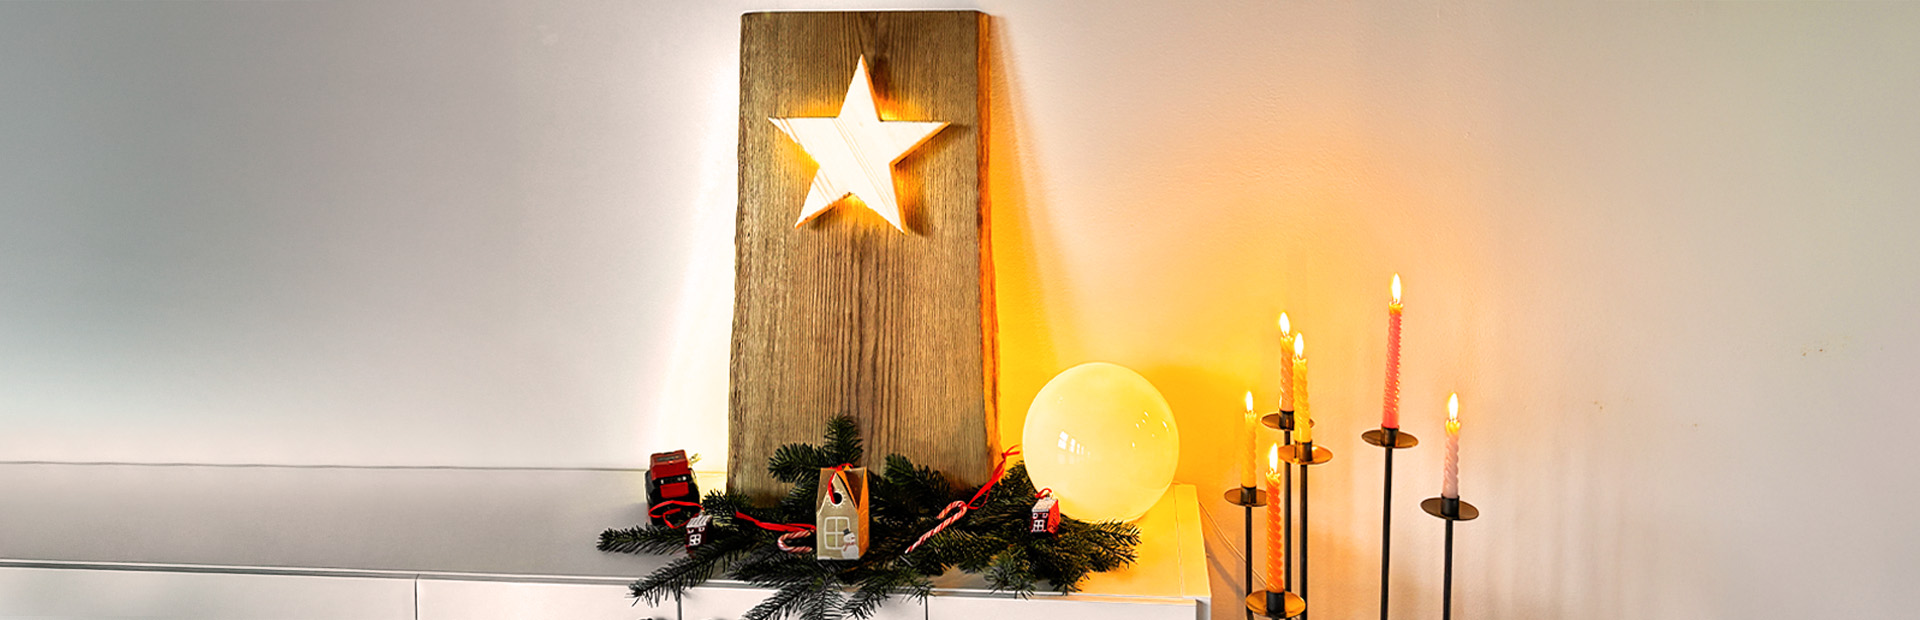
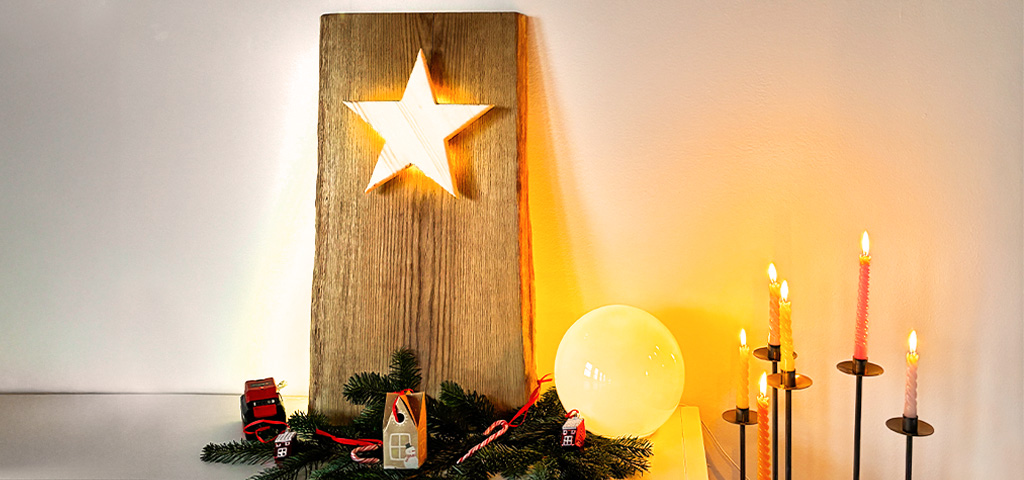

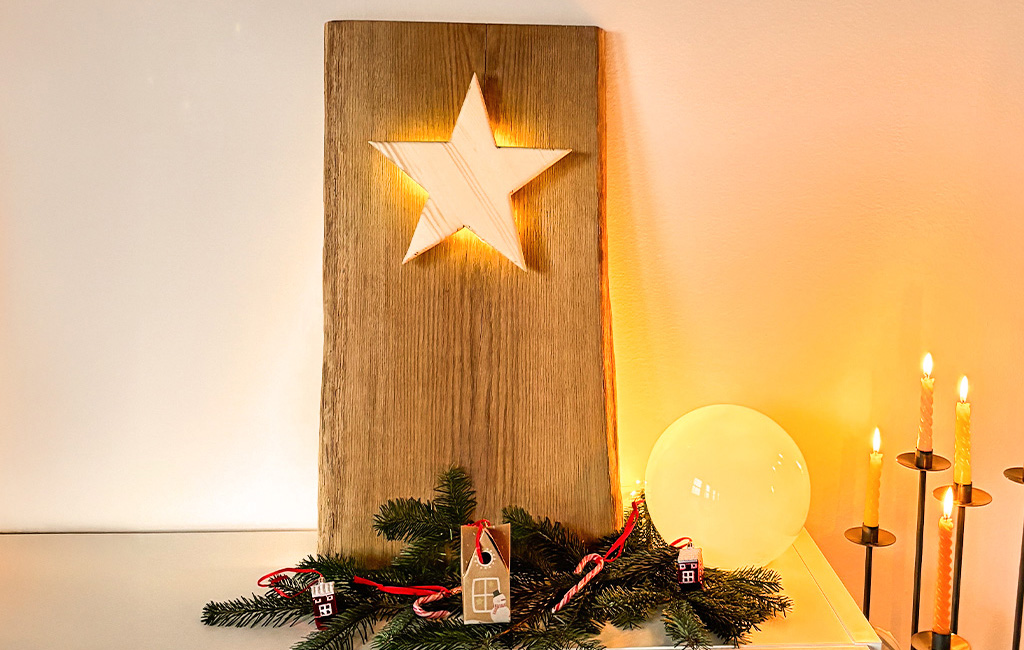
Wooden Star Decoration
DO IT YOURSELF
Wooden decor is among the most popular decorative elements during the winter and Christmas season. The combination of rustic, brushed oak and a light wooden star creates a particularly warm and natural look.
This DIY project shows step by step how simple wooden boards can be transformed into a stylish decorative piece that suits almost any living environment thanks to its clean shape and high-quality appearance.
In this article, we show you how to quickly and easily make a wooden star yourself.
Tools and Materials
Material
- Board “Oak”: Height 81 cm, width 45 cm
- Board “Spruce” (star): Height 81 cm, width 40 cm
Instructions: Building the Wooden Star
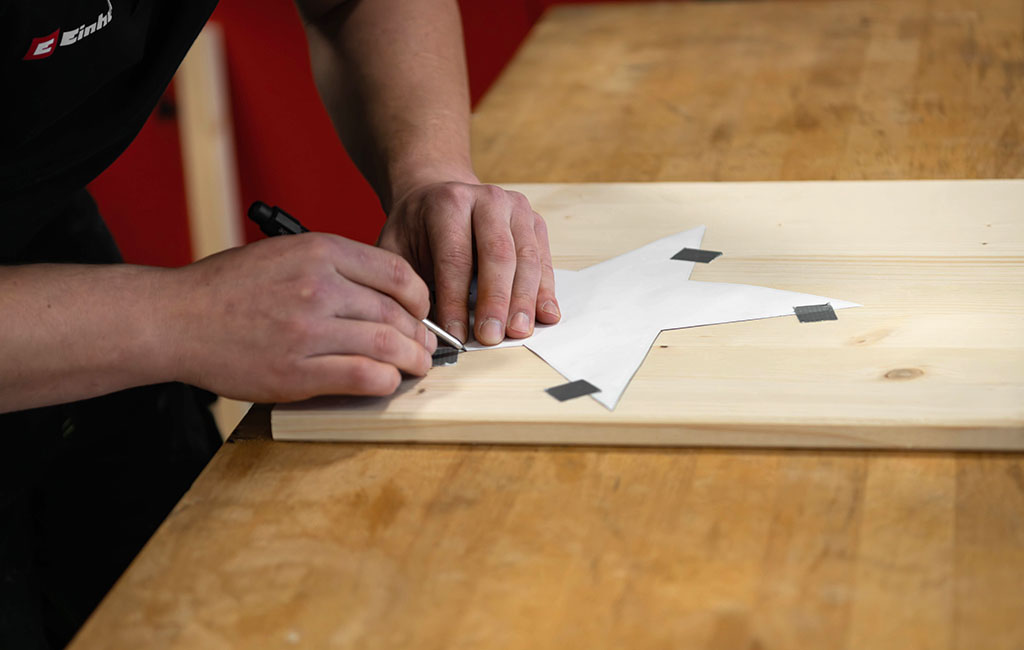
Step 1: Marking the star
Draw the star shape onto the spruce board. A clear, symmetrical template will make the later finishing much easier.
❱❱ Tip: Choosing the right type of wood is essential. Soft woods like lime or spruce are easier to work with, while hardwoods such as oak are more durable but more challenging to process.
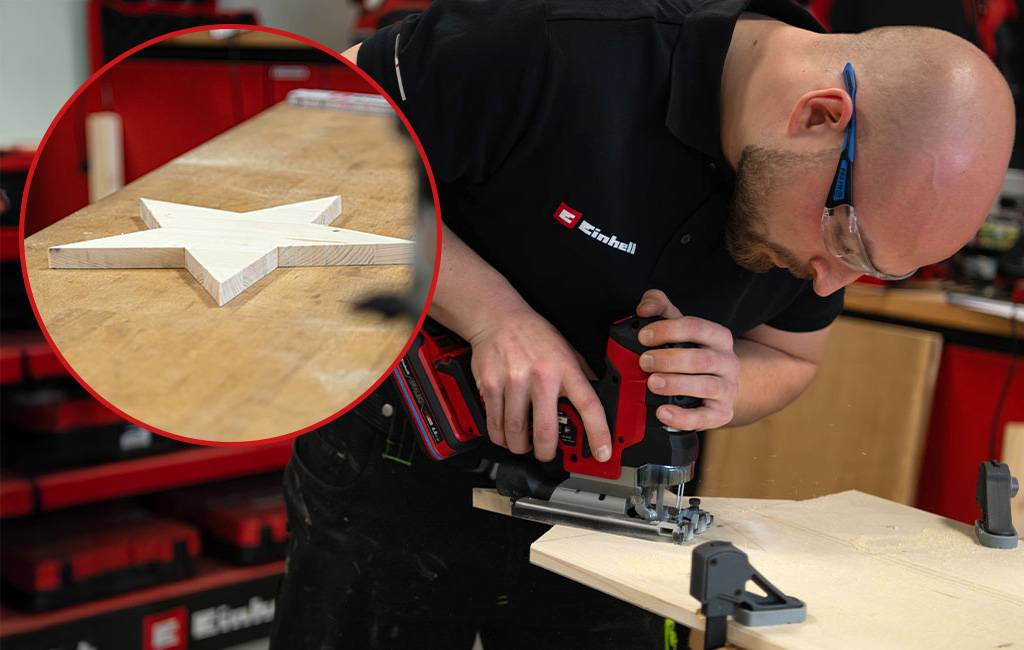
Step 2: Cutting out the star
Before you start cutting out the wooden star, secure the piece of wood firmly to your workbench with clamps to prevent it from slipping. Then carefully cut along the lines with the jigsaw to cut out the star.
❱❱ Tip: Work especially carefully and slowly at the star’s points so that the wood does not splinter.
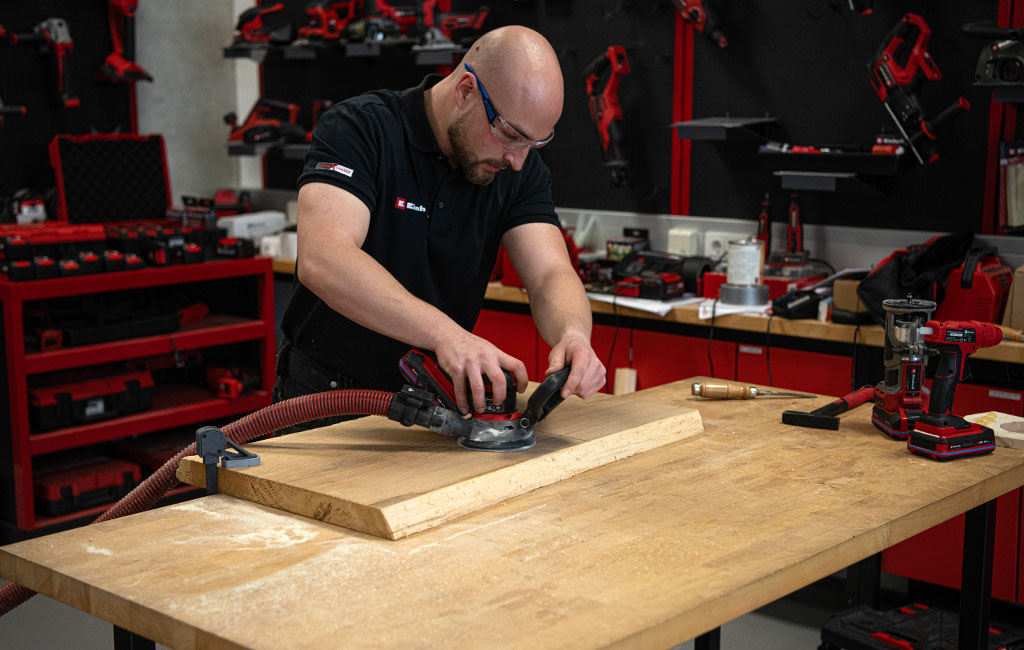
Step 3: Routing and sanding the star’s edges
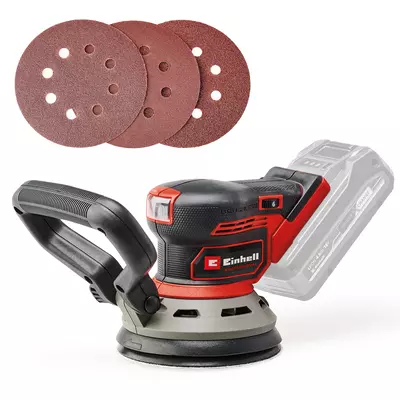
Use the router to shape the edges, giving them a smooth and clean finish. Then sand the star with the random orbital sander—first with a coarse grit to remove any irregularities, then with a fine grit to achieve a smooth and pleasant surface. After this step, the initial shaping of your star is complete.

Step 4: Removing the bark from the oak wood
The solid oak board, onto which you will later attach the star, first requires a coarse pre-treatment. Use the random orbital sander to remove the outer bark. This step focuses on clearing away loose bark pieces and creating a basic surface. As oak bark can often be quite stubborn, you should work in several passes.
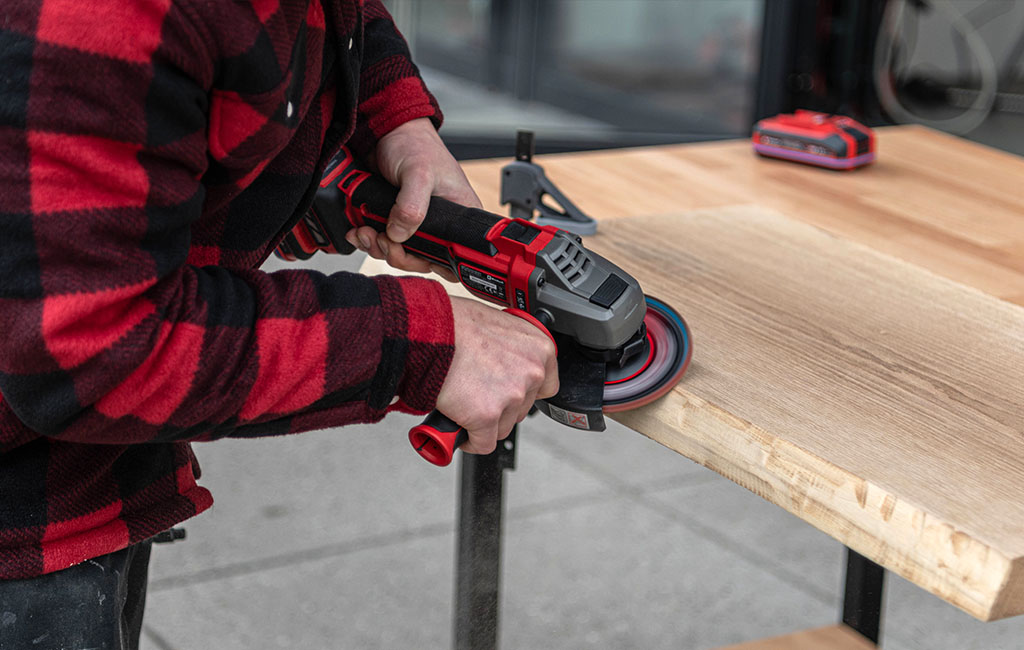
Step 5: Removing finer bark remnants
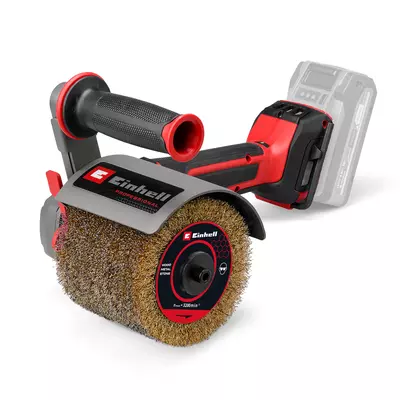
Now you can use the angle grinder to remove the remaining bits of bark. Thanks to its higher removal performance, this tool is particularly suitable for hardened and firmly attached layers. This prepares the board evenly and gives it a clean, defined wooden surface.
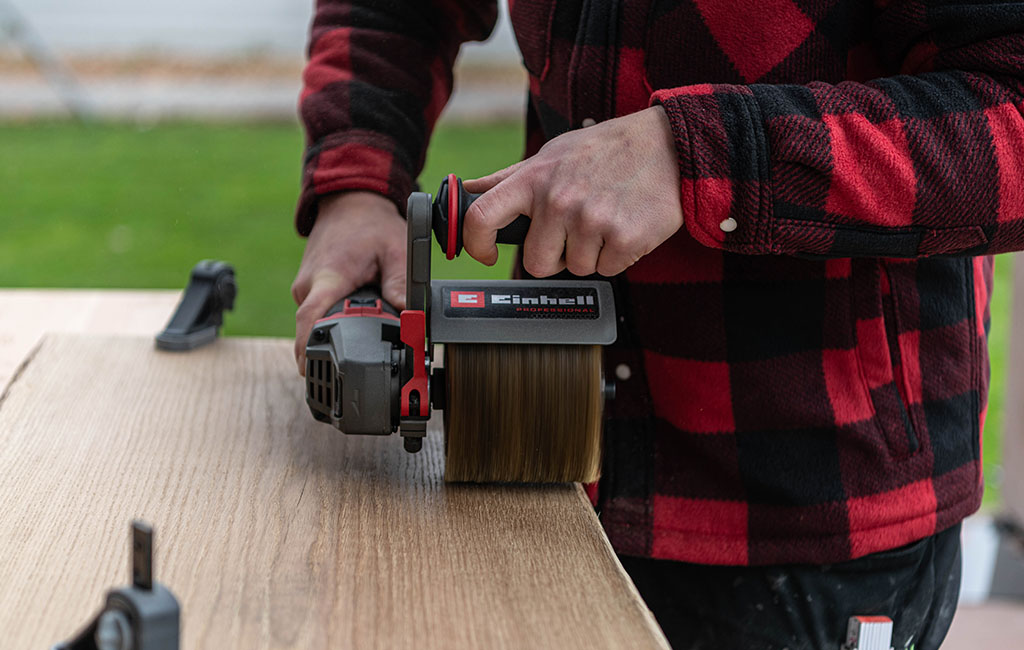
Step 6: Brushing the surface
Now brush the wooden board with the wire brush grinder. This creates the characteristically rustic look by removing the softer wood fibres and making the grain stand out more clearly.
❱❱ Tip: The longer you brush, the more pronounced the texture becomes. For a softer look, simply stop earlier.
Step 7: Cutting out a round wooden disc
Cut out a round disc of around 10 cm from the wood – this will later serve as a spacer, allowing the star to stand slightly away from the oak board. This gap creates a lovely 3D effect that significantly enhances the visual appeal of the project.
❱❱ Tip: The thicker the disc, the stronger the 3D effect will be.
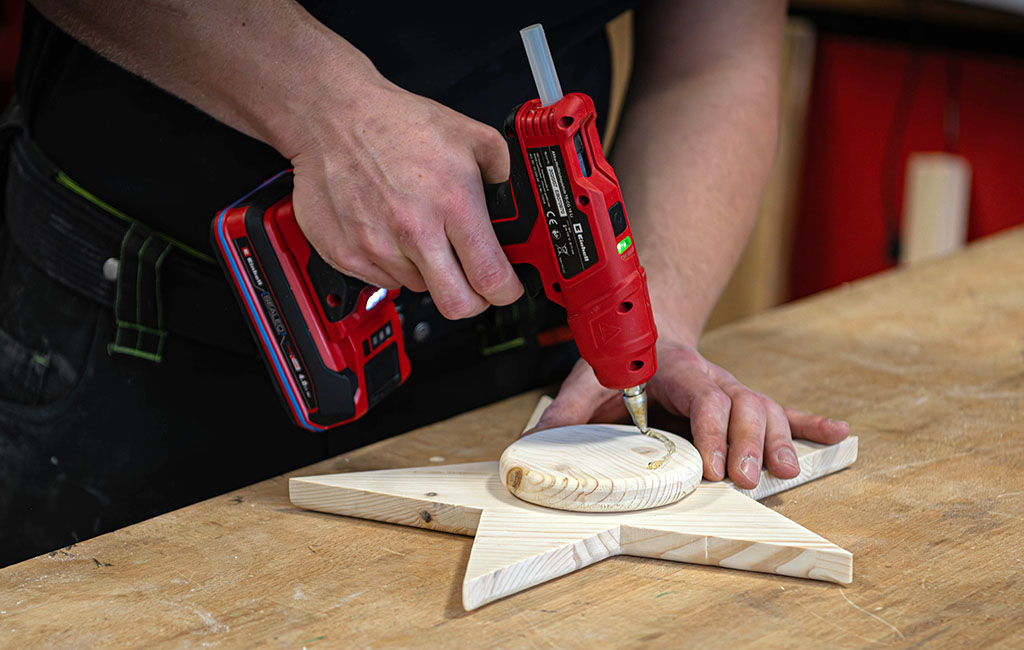
Step 8: Attaching the disc to the back
Now glue the round disc to the centre of the back of the star using hot glue, so that it can later be mounted securely and with a slight elevation. It is important that the disc is positioned exactly in the centre to ensure the star looks straight and balanced. Allow the glue to fully harden before continuing.
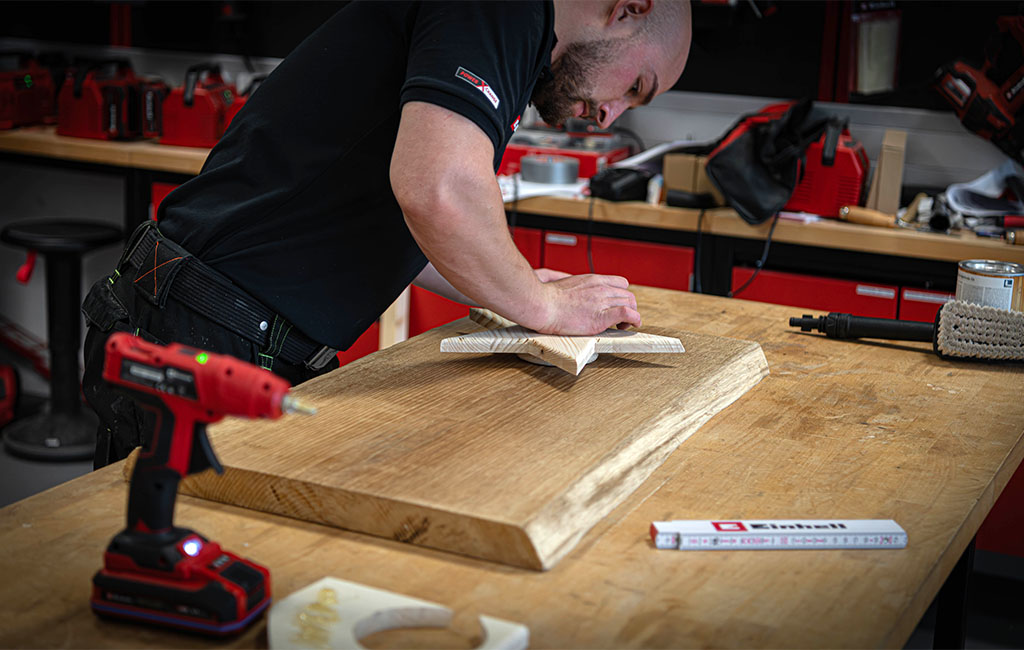
Step 9: Gluing the star in place
Now glue the prepared star—spacer side down—onto the centre of the board. The spacer creates depth and a lovely shadow effect.
❱❱ Tip: If you want to be completely sure that the star is perfectly centred, lightly mark guide lines on the board beforehand – they will no longer be visible later.
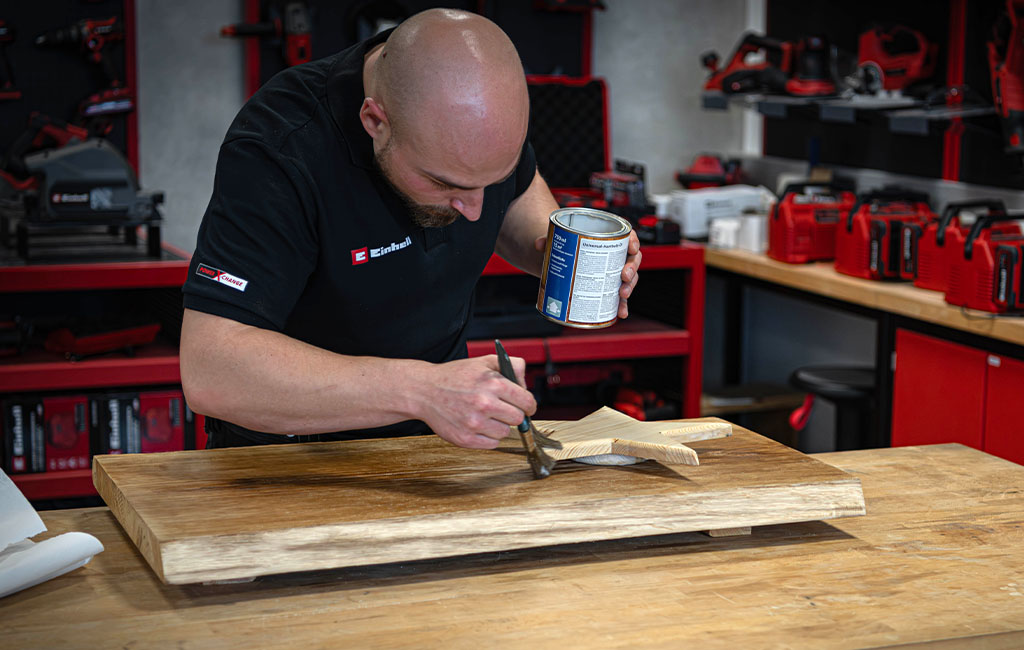
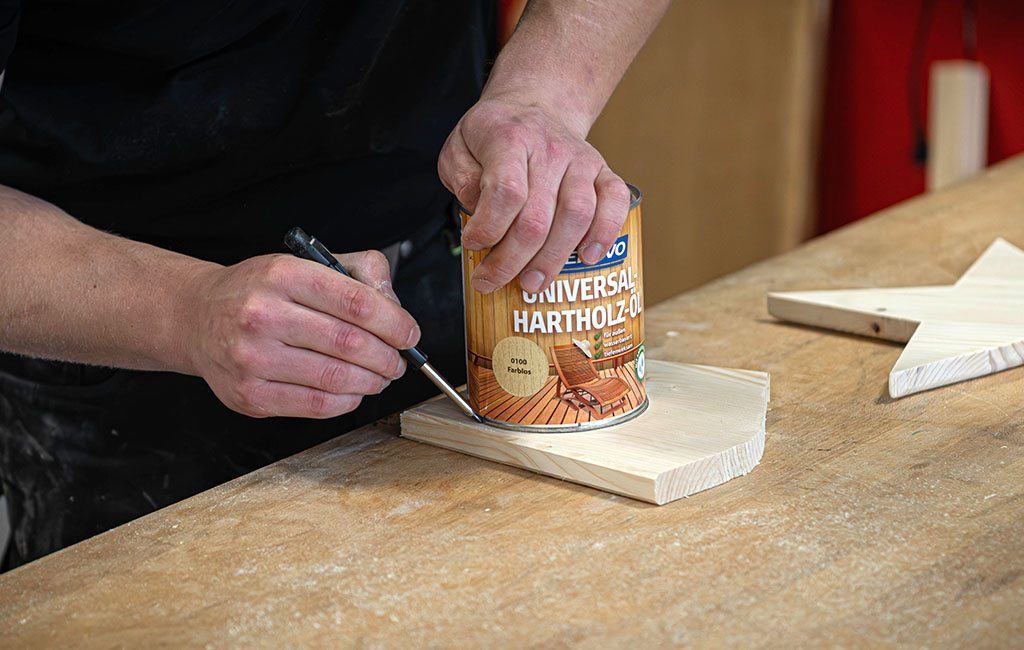
Step 10: Oiling the oak wood
Now oil the oak board. This enhances the warm colour of the oak, highlights the grain and also protects the material.
❱❱ Tip: Wipe off any excess oil after 10–15 minutes with a cloth to achieve an even, elegant sheen. Note: The board should be allowed to dry thoroughly after oiling.
Step 11: Adding the fairy lights
To create a warm and cosy atmosphere, you can finish by adding a small LED string of lights – either behind the star or along the back of the board.
❱❱ Tip: Warm white LEDs look more natural and complement wood best.

- Your unique wooden star decoration is now complete! The result is a real eye-catcher – simple yet striking.
Have fun recreating it!
Suitable Tools for the Project
Here you'll find Einhell tools and accessories that are perfect for bringing this DIY project to life.


In this article you will learn all about:

Published on 27.11.2025
Whether it’s smart tool tips or exciting DIY projects: Philip shares his passion for powerful equipment and clever solutions for everyday home improvement. For many years, he has been training both Einhell employees and external partners, providing product knowledge and demonstrating hands-on applications. With plenty of expertise and enthusiasm, he also brings his own project ideas to life and lets his community follow along. His content combines practical expert knowledge with creative inspiration for every workbench.