


Everything you Need to Know about the Drywall Polisher
The drywall, ie. the construction of lightweight walls in pillar construction or the unhanging of ceilings, is a major issue in many renovations in the own home. If the rough work, like the constructing of the stud, is still performed quite quick, many do‐it‐yourselfers despair of fine‐tuning. In this field, the drywall polisher has all the advantages over the orbital sander or even the hand‐held sanding block.
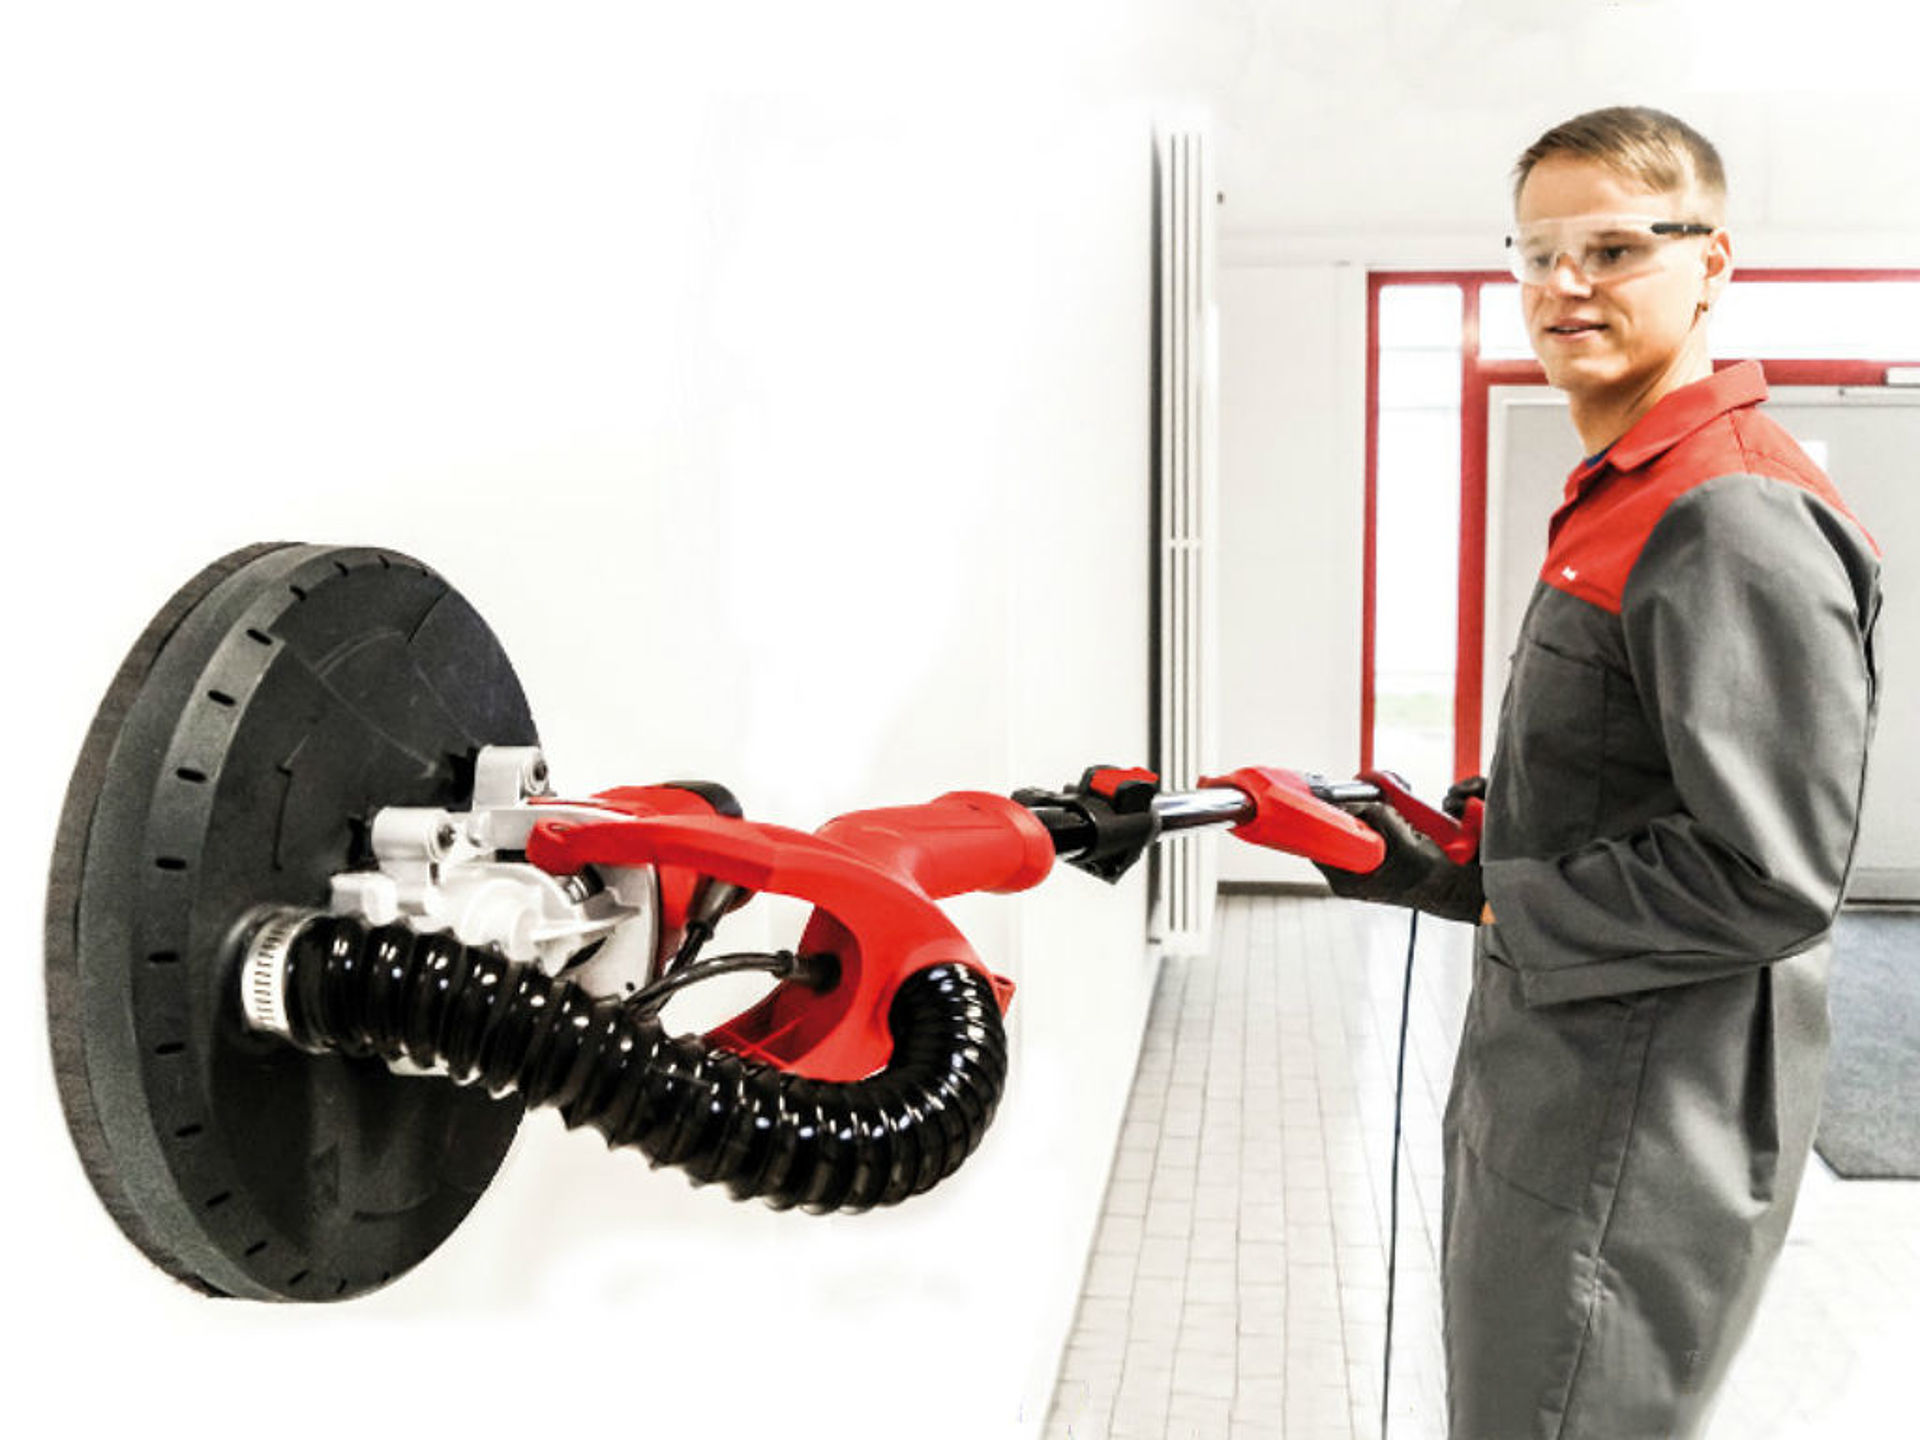
What exactly is a Drywall Polisher?
The Drywall Polisher is similar in design to an orbital sander which is attached to a long telescopic handle. The telescopic handle allows the user to adapt the grinder to all common ceiling heights. Even suspended plaster ceilings in smaller stairwells can be sanded comfortably and, above all, without having to work classically overhead. The drywall sander has on top of that several freely adjustable joints, so that really anything can be easily reached without dislocation. In addition, a triangular grinding wheel, which is included in the Drywall Polisher TE‐DW 225 X, ensures that even the smallest corner can be processed with the sander. You can control the grinder due buttons on the end of the handle, which make it possible to start and stop the drywall sander directly in position. But also the speed control can be adjusted, so you don’t have to raise or lower the grinder every time. Common grinding wheels have a diameter of 225 millimeters and can easily be changed thanks to the hook and loop system on the back. The brush ring of the Drywall Polisher is resiliently mounted on good equipment, this prevents it to hit anything and allows you a maximum range of action, while using it on a ladder.
The Preparatory Work in Drywall Installations
Once the gypsum plasterboard has been screwed tightly to the pedestals of the lightweight wall or the substructure off the ceiling, the transitions between the individual boards must be levelled. In this case plaster is usually used, which is applied flush with a finishing trowel. Since gypsum has the property to deform during drying, at least two passes are necessary here. Between the application of the individual layers, it is advisable to remove every coarse adhesion accruing. On small, easily accessible surfaces, a hand‐guided sanding block is usually sufficient here. However, as soon as the surfaces become larger, or are difficult to access, for example, on the ceiling, there is hardly any way around the drywall sander.
At the latest after the application of the last gypsum coating, it is necessary to grind the entire surface of the gypsum plasterboard. At the latest in this phase, in addition to the transitions between the individual plates, also the screw heads of the fastening screws were filled.
Sanding in several passes
When sanding drywall panels, you should work in multiple passes. The starting point here is usually a grinding wheel with a grain size of P60 or P80. It is important to ensure that you don’t remain on a point too long. Otherwise, it quickly happens that you grind too deep and therefore have to add filler. After the first sanding with a relatively coarse sandpaper, one changes to a paper with a higher grain size. For example, a paper with P120 grain. This removes the sanding marks from the previous sanding and creates a flat surface. With a little practice, the drywall sanding is very easy of the hand and the result is the work of a professional in any way.
Dust Formation during Grinding
It is well known that sanding gypsum is one of the dustiest activities. The dust that arises here, likes to stubbornly stuck in all cracks and grooves. To avoid the majority of grinding dust, it is therefore urgently advisable to use a workshop vacuum cleaner in order to catch the dust as far as possible where it arises, ie. at the grinding head. For this purpose, many drywall sanders have a connection option at the lower end of the telescopic handle. The stem is used here as an extension of the vacuum cleaner tube and thus the dust can be vacuumed directly with the sanding pad.
For an overall Summary of all the different Grinders, visit our Grinder‐Guide!
In this article you will learn all about:

Published on 30.07.2021
Whether it's the garden or the workshop, Hauke Leweling is a true all-rounder and a freelance blogger. For Einhell, Hauke is armed not only with pen and paper but also with various gardening tools and equipment that he thoroughly tests. He shares his experiences, as well as tips and tricks, in his blog posts.